Showing posts with label tips and techniques. Show all posts

Thursday, March 13, 2014

Are you ready for technique OVERLOAD?

I hope so!

Last May I was asked to fly into Washington and film some videos for Clearsnap Inc featuring their products. I have to say, even though this was a whirl wind adventure... I enjoyed the time I was able to spend with my friends at Clearsnap as well enjoy the gorgeous scenery that is Anacortes, Washington. I was able to spend some time with the Clearsnap Inc crew as well as the filming crew of KP Studios.

We spent two days filming over 30 videos and over all we succeeded in over viewing the current line of Clearsnap products at that time. It was a jam packed fun time and I hope to do it again.

Well what does this mean for you? A TON of technique videos of course!

Here is a screen shot of what the videos look like on the website. To access the videos simple click here and scroll down to the videos titled TECHNIQUES.

http://www.clearsnap.com/projects.cfm

Besides myself, there are a ton of my friends and fellow crafters on the site that share their love for Clearsnap Products.

I encourage you to grab a cup of coffee, your sketch book and enjoy a video or two.

Enjoy!

~Liz ♥


Monday, October 1, 2012

Virtual Gallery Walk- PAJWLH

So today is the first day of our Virtual Gallery Walk! If you are not up to speed about what this concept is... check out my article from last weeks post here about the Virtual Gallery Walk. The name of this exhibit is Artistic Inspiration: Then and Now.


For this exhibit of our Virtual Gallery Walk, we decided to use various forms of inspiration to draw from. My initial thought was to draw inspiration from classic artists, but with this group of artists... the sky became the limit. Our talks went from story books, to music and well... it just expanded. So the focus for this exhibit will be Artistic Inspiration: Then and Now...

Here is what I came up with :)


My initial inspiration was an artist that I was introduced to during my drawing class. I loved my drawing class because our teacher had a really unique approach to teaching us the basics of drawing through varying mediums and artists. One of the artists that I was drawn to was Sigmar Polke.

Here are a few samples of his work, and for more samples click here to view google images.


Upgrade (Lens Painting) (2007)
mixed media on fabric
31 1/2 x 39 1/4 inches
source:oneartworld.com
 
       source: escapeintolife.com

What I enjoyed about his art was of course his mixed media approach to some of his pieces, but also the use of layers through varying effects such as screen print or image transfers and stencils.

Another inspiration of mine is street art... I have become enamored with the use of stencils in street art and the juxtaposition of some of the placement  of art and content. Banksy and Shepard Fairey are the two that come to mind when I think of influential street artists. With street art you are faced with a canvas that is opportune and available. I love that some of the work that street artists create often cover advertisements, or flyers that are stuck to the wall. Mostly just in the way  that it creates texture... not so much in the illegal way it costs communities to restore.

So with this in mind, I set out to create a piece that offered techniques such as stenciling, screen printing and image transfers but that offered the texture of a random surface. I love the look of stenciled street art that has been created over walls that previously held papers, posters and such... the textures are amazing! That was one of the attributes I knew I needed with this pieces. I had planned on screen printing a bit on this, but after I looked at the last layer I laid... I didn't think it was necessary. So this is it :)


Take Hold of your Dreams

Mixed Media 8x10 Canvas Board
Acrylics, Inks and Resin
Supplies: Acrylic Pigments (Plaid enterprises), Epoxy Resin (Ice Resin), texture stamp (Unity Stamp Co.), spray Inks (Clearsnap and Creative Imaginations), Stencil (Creative Imaginations),  Thread (Gutterman) letter stamps sequin and vintage paper (unknown)


Here is a view of the Resin I applied on the piece. I wanted to add lacquered sort of layer, that was sporadic and not completely covering. I considered using a gel or glaze medium, but I really wanted a TRUE lacquered feel that was completely transparent. I chose to use Ice Resin for this result. PLUS the depth that it offers the piece too :)


 This is a downward view of the right side of the piece. I have a cascade of sequin, thread, glitter, inks and paints creating layers and depth across this piece.


 Now if we are friends on Facebook... you might have heard about my "staples" incident... well these are the staples that were stapled to my hard wood floors... thank God they came up :)


 Here is a bit more of the texture, showing the basket weaving that is in the middle section of this piece. 


The idea for this gallery walk is to remind us all that our reason for creating, though it is our own... is the same as those who we follow... Even the greats had our drive, our passion... we are artists... just as they are. Notoriety has nothing to do with it. We create because it is who we are, not because it is who we want people to see us as... It is a part of who we are.

Today for the gallery walk, we also have the wonderful Jen Cushman sharing. Make sure to check out Jen her on her blog. Jen is part of the magic behind Ice Resin, which I am pretty sure that most of you have fallen in love with! You will definitely want to check out what she created :)


PAJWLH

 I am trying to catch up on some prompts since I have been ill the past few weeks. This blog post seemed perfect to add a prompt to. If you are not familiar with PAJWLH... check it out here. This is a free art journal workshop that I offer on line this year.

Prompt: Why do you create? for your family? For yourself? for healing? For work? look into the root of why it is you create. Is this the reason you started to create in the first place? Does it make you happy? Why?

Creative Prompt: Use a stencil, image transfer or silk screened image.

I am pretty excited that this is the start of this fun artsy adventure... I have chosen some good girls that are amazingly talented... I am so glad they said yes and that you get to be a part of this with us.

So enjoy this gallery walk... I will be your tour guide if you get lost, just hop back over here... am I will guide you to the right part of the exhibit for the day. We will be doing this from October 1st through the 5th... I am sure you will have a blast, pick up a few artistic inspirations that will get your creative juices flowing!

See you tomorrow :)

~Liz Hicks

Tuesday, September 18, 2012

Creative Crayons- Clearsnap Giveaway!

We are counting down to the last TWO episodes of Everyday Creative on My Craft Channel. I hope that this has been a fun adventure of techniques for you to enjoy. I know I have enjoyed getting to share each week with you a little tidbit of fun.

Next week is our GRAND FINALE which we will be creating a faux encaustic canvas. Along with that, we are having a BIG GIVEAWAY full of prizes from all of the companies that have participated with giveaways. So you will want to make sure you check back for that.

For this weeks episode, I am sharing a bit of creativity with wax crayons. you may remember a video I had created back a bit with using crayons in a glue gun... well this weeks video of Everyday Creative shows you that and BEYOND. Watch it here. Here are the two projects I used it this weeks episode.

Thanks 6x6 Card


The Real Me Art Journal Cover
Originally a part of PAJWLH (Progressive Art Journal Workshop with Liz Hicks) seen here.


Products used for both of these products are from Prima Marketing Inc and Clearsnap Inc

Both projects were created with techniques using crayons  and are featured on the episode of Everyday Creative- Creative Crayons. The art journal is a part of the free art journal workshop I offer here on my blog. If you would like to see more art journal prompts, click here.

The winner of last weeks prize package is: KATINA! Congrats!!!!


a Rafflecopter giveaway


And for this weeks giveaway... We are featuring a collection of Clearsnap Goodies (Smooch ink and Smooch Spritz!) to enter in to this weeks prize, use the widget below. If it doesn't show up, refresh the page and it will load.

  a Rafflecopter giveaway

This was another fun episode to share. I can't wait for next weeks episode... It is our last :( but It is good... and a whole lot of fun!!!

Thanks again!

~Liz Hicks 

Tuesday, September 11, 2012

Faux Copper embossed album- (Giveaway)

I can't believe that we are already on week 5 of Everyday Creative on My Craft Channel. These segments have been so much fun to share with you all. I am so grateful to be able to share some of my crafty ideas.

This week I am sharing an inexpensive way to create a beautiful mini album. This technique can be used in a variety of crafting from altered decor to scrapbooking... the choice is yours!

Make sure to watch the video to see how I took a dollar store item and made this fun mini album... YES I said dollar store crafting (made chic!). The base of this album only cost me 50 cents since this came in a set of two for one dollar! :)


Watch the video HERE. (Thanks for letting me know Mary and Lynn!)

Faux Copper Embossed Mini Album


Once again we are having a giveaway for this week using companies that were seen in this weeks video. This week we have some great prizes from Spellbinders Paper Arts, Clearsnap and Creative Imaginations.

Here is what this weeks prize package will consist of:


(5) Spellbinders™ M-Bossabilities™  Folders plus one raspberry spacer plate

(2) 6x6 paper pads from Creative Imaginations


And a selection of Clearsnap goodies
(not pictured)

Here is our winner from last week, Congrats Lisa F.!

a Rafflecopter giveaway

And for this weeks giveaway here are your options to enter :)

Make sure to use the Rafflecopter Widget below to enter. If it doesn't show up.... refresh the page and it will be there.

  a Rafflecopter giveaway

Thanks again for your support, I hope this weeks video sparks your creativity to take a stroll down to the dollar store.

~Liz Hicks

Tuesday, September 4, 2012

DIY Shadow Box frame- (Giveaway)

Today I am sharing a little DIY trick over on My Craft Channel show, Everyday Creative with Liz Hicks. For this fun project we are using plaster cloth, some Graphic 45 papers and some goodies from Clearsnap.

I have always been a fan of plaster cloth for 3D arts but thought it would be fun to use on a paper crafting project. This is a cute little 6x6 shadow box I created using plaster cloth and a sneak material that you will see on the video. This shadow box is a little different from the one I created in the video, but some what the same. I gave the original to a sweet friend of mine which gave me a reason to create a new one!


You gotta love the depth of this little guy.


Here is a little close up of the depth with the stamp details (Graphic 45 stamps)


So make sure to check out this weeks giveaway featuring some wonderful products from Graphic 45 and Clearsnap... Here is what is being offered by both companies! (edited to add Graphic 45 picture).


I will be sharing another fun project tomorrow using this technique in a scrapbook/mixed media/art journaling way, so you will want to make sure to come back and check it out! Also Graphic 45 is sharing a beautiful shadow box on their blog today as well, make sure to swing by and show them some love too!.

Here is our winner from last week... Congrats Christine on winning the wonderful prizes from Creative Imaginations and Clearsnap!

a Rafflecopter giveaway

AND for THIS weeks Giveaway, follow the prompts in the widget below for your chance to win! REMEMBER there is both Clearsnap and Graphic 45 products in this giveaway! If the widget doesn't work, just hit refresh and it will show up :)
 
a Rafflecopter giveaway

Thank you again for being a part of this fun web series... I keep thinking of so many fun techniques that I need to try and sit down and video. Hopefully after this series ends, I can spend some time taping again :)

Thanks again!

~Liz 

Tuesday, August 28, 2012

Everyday Creative- Creative uses for Glass Bead Medium (GIVEAWAY)

So it is that time of the week again! A time to share this weeks episode for Everyday Creative with Liz Hicks over on My Craft Channel! Today's show is one of my favorites. For this show I am sharing some creative uses for Glass Bead Medium. What is Glass Bead Medium, you ask?  Well it is an gel based medium that has clear micro beads suspended in it. I haven't actually checked to see if the beads are glass, they seem to me to be more of a synthetic of some sort (depending on the brand), but either way it is gorgeous and sparkles beautifully. Your result is a beautiful clear gloss with a bumpy organic texture, pure and clear and absolutely beautiful... that is until you get creative with it and make it GORGEOUS!

Here are a few of the samples I used for this segment of Everyday Creative with Liz Hicks over on My Craft Channel.

Hope is the parent of Faith (Mixed Media Canvas Board)


Here is a close up of technique one I share on the video... For this technique I am using Creative Imaginations products with Glass Bead Medium


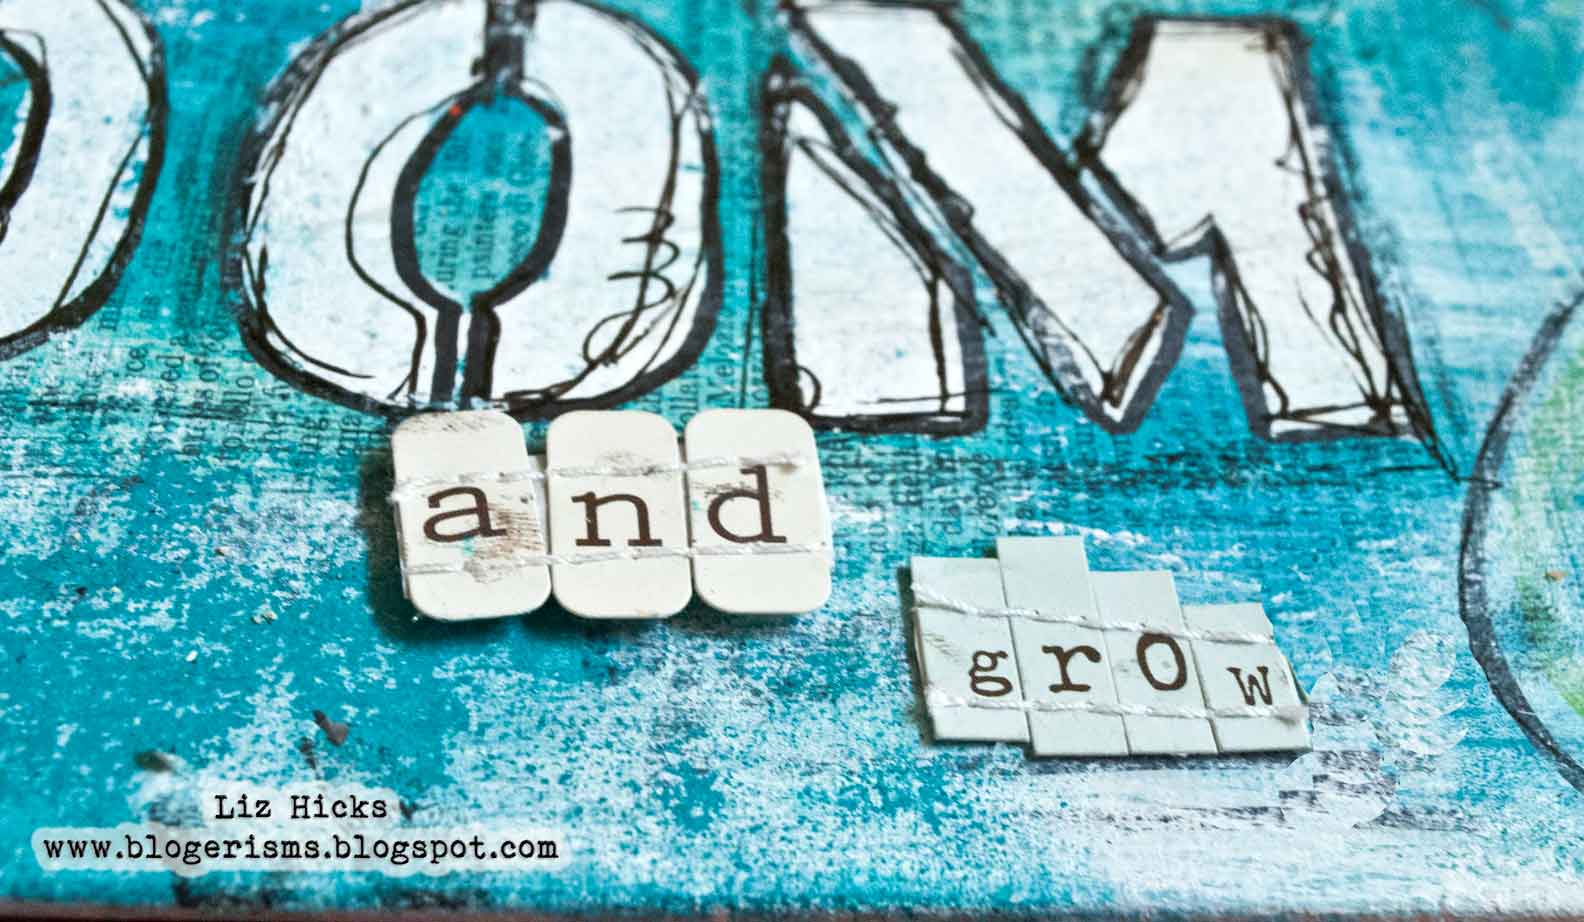
Bloom and Grow (Mixed Media canvas Board)


Close up of technique two I share using Clearsnap Inc products! 


And our WINNER for last weeks giveaway of Ice Resin and Clearsnap Products IS.....


a Rafflecopter giveaway

And for this weeks giveaway... we have a wonderful giveaway of prizes from BOTH Clearsnap AND Creative Imaginations! Make sure to use this widget below in order to enter into the giveaway (If it doesn't appear, hit refresh) ... There are some fun ways to enter that hook you up with these great companies!

 a Rafflecopter giveaway

Thanks again for your support and for viewing the videos that I created for My Craft Channel. I hope you have enjoyed them, and feel free to let me know what you would like to see more of.


 ~Liz Hicks ♥

Wednesday, August 22, 2012

Back to School Teachers Gift- easy and fun PLUS Bo Bunny Giveaway

 I have a report up on The Scrap Review today! I was fortunate enough to be able to review BoBunny's new Detour Collection.


Now technically, I am a scrapbooker... but my inky painty side always kicks in, so here are a few peeks of some of my projects from my review. To see the rest of the projects, my full review AND a GREAT GIVEAWAY... make sure to check it out here on The Scrap Review blog.


I had some product left over so after I finished my projects for the review... I made these little cuties for the kids to give to their teachers yesterday since it was their first day of school. I had to work quick, but I think these came out pretty cute considering the time I had left before picking the kids up from school. (On a side note... making sure that your cookies have time to cool after baking is highly suggested, I learned the hard way)


If you are looking for a fun idea for a back to school teachers gift... this is a fairly easy one and was a huge hit!. Even the kids loved it.

Instructions:
  • Make yummy cookies :)
  • take a regular size sandwich bag
  • Use a 6x6 piece of patterned paper... I used the Bo Bunny Collection for this one, fold in half
  • Seal sandwich bag and place the folded crease on top overlapping the bag
  • Next staple starting with one side, folding in excess bag as needed, staple other side to completely seal
  • Decorate your topper as desired!
This is a really easy homemade teachers gift yet fun too! The teachers LOVED them and the kids thought it was funny that the teachers would have an emergency that required cookies!


Tuesday, August 21, 2012

Everyday Creative- Custom Resin Gems and casting

This week on Everyday Creative we take Ice Resin a step further and create custom gems for crafting. These beautiful gems can be used in any type of crafting from paper crafting (card making, scrapbooking, altered arts) to home decor, fashion to mixed media art. These beauties can be used for ANYTHING!

Make sure to check out this weeks video HERE... Custom gems and molds... this is a whole lot of fun!

Here are a few projects that I share on the show as well as some close up shots of products in use.

Us 12x12 transparency Layout


Here is a beautiful close up of the gem that centers this organza flower... it is awesome to customize your gems any color you desire!
  

Dupioni  Silk Accessories


In this project, the resin gem sits comfortably in a beautiful flower as its center. This hair piece can easily be used as a broach or even as a scarf or purse accent.


And of course in order to customize your Ice Resin... you need some pretty cool products to do so. To color your resin, you will want items that have a similar base to Ice Resin. Since Ice Resin is an oil base, a natural mixer would be oil paint to colorize your resin. You don't always have to use like bases, but it does help to make it easier for the products to mix (something I learned from my friend Jen Cushman).

If you really want to get creative... here are a few of MY favorites to colorize and customize Ice Resin.


Clearsnap makes an AMAZING selection of products that you may not even have thought of to colorize your resin or art materials. One of my favorite techniques is to use their re-inkers to create varying effects. They also make an amazing arrangements of glitters and accent pigments that are a ton of fun as well.


First up is the Clearsnap Archival Dye Ink Refill. This product is used traditionally to re-ink your ink pads... but it is good for so many other uses. When mixed with Resin, it offers a beautiful transparent effect that you can see through. This gives the effect of a semi-precious stone or jewel.


For this Onyx looking gem, I used the Clearsnap Black Pigment Ink Refill. When mixed well, it gives the effect of an opaque onyx gem. Really beautiful.


For some fun, I added Clearsnap Glitter to the resin gem below... Here I used a lot of glitter to give the gem an extra beautiful sparkle.


And here I used the same Clearsnap Glitter to give the gem a lighter sparkle that you can still see through.


 For this gem I used an economy oil paint that I purchased in a set at my local craft store. I wanted to make sure that this gem was next to the next gem so that you could see the difference. In this gem you can see a mild mottling of the color.


 Where as with this gem, I used the Clearsnap Pigment Ink Refill in a similar blue color and mixed it half the time than I mixed the black onyx gem. This offered the custom gem to have more of a mottled organic look similar to turquoise or agate.


And with this pink beauty... I used Clearsnap Smooch Pearlized Accent  Ink to colorize it. I used a pink which offered a gorgeous color and yet an even more gorgeous lustre of pearl due to the products highly metallic features.


With this gem below, I decided to have fun and just through some stuff in it :) This is just a reminder of how much fun Ice Resin is and how you can literally throw just about anything in it... This is a product to be experimented with and have fun!


 So I hope this all makes sense to you... This is a fun fun way to explore and experiment with your favorite Ice Resin and Clearsnap products. And of course to pass the fun and inspiration on to you all we are having another giveaway but before we announce that...lets announce our winner from last weeks giveaway!


Our winner for last weeks Ice Resin Giveaway is:

I have seen this product where i work and am excited to try my hand at it! you can make such beautiful things! just adore the bracelet and the sparkle!so many ideas!

Dana, please email me at primadonnaliz@yahoo(dot)com and I will forward your info onto our friends over at Ice Resin.


For this weeks giveaway... we are going to be having some fun on Twitter! Make sure to use the widget below for your entry!


a Rafflecopter giveaway

Thank you again!  If you have any questions... feel free to email me :)

~Liz Hicks ♥