Showing posts with label handmade gifts. Show all posts

Thursday, December 18, 2014

3 Easy Holiday Crafts With Hersheys Chocolate kisses

Every once in a while I get the opportunity to try out products for various companies. Mostly for the craft industry but lately I have had other types of companies and products come my way. My life (although full of crafting) has so many aspects to it... all of which I love to share here on my blog, Twitter, facebook or instagram.

It's me. It's my family. It's my life. It is probably very similar to yours too. And that's why I share, because chances are we all are going through similar things, like similar things and well if I can share something helpful, I will.

This summer I started receiving Voxboxes from Influenster to try out various products. I receive these products complimentary with no compensation other than the products themselves. I get the products, test them out and share my experiences with them. Pretty simple and it helps to break up the monotony of contract work with this little sprinkle of fun. It is a lot of fun to get a mystery box of goodies to play with.


This seasons Voxbox was for Hershey's Kisses (#merrykissmas). This makes sense for our family since we bake and craft a whole lot of stuff for the holidays and Hershey's are really easy to add into the mix.


Kids Craft- Puffy Candy Garland


This craft is perfect to do with kids, even younger kids. Using broader point needle helps to teach kids some good hand eye coordination, but also give them the basic skills of sewing. I recommend supervising kids as they create this even though it is such a simple craft.


Supplies:
dental floss
tapestry needle or other broad needle
puffy craft balls
Hershey Kisses
cute crafty kids :)

To begin simply take a string of dental floss and thread your needle. I only have the thread pass through once to keep the thread thin. tie the end to help prevent your garland from falling apart. Proceed to thread sequences of kisses and puffy balls. We did 3 puffy balls to 1 kiss. This can also be a great time for kids to work on color pattern sequences as well. You can structure this as a learning tool for kids or you can just let them have at it and create. Your choice, either way its fun, easy and something they accomplish which is always a win. When you are done tie off the end. Kids can gift wrap this and give it to friends, this can be a candy/craft garland that they share with a friend as a part of a crafty gift basket... truly the possibilities are endless with this. After the gift is given, the kisses can be eaten and the puffy balls can be used to help learn counting, or for older kids they can be used for crafts. In our family when our children were younger, these puffy balls were used as currency in our home... so seriously the sky is the limit with this craft and the creative ways you can integrate it into your home or gifts.


In Case of Emergency "Relax" Kit


My first craft I made with my Hershey Kisses was some hostess style gifts. I gave these to the brave moms who helped me wrangle 15 girls for my daughters 9th birthday party last week. It didn't take long, but it was a nice way to share a treat with my friends who helped me so very much.


supplies:

string or twine
2x2 white cardstock
ink
stamp- Collage of Digits- Unity Stamp Company (Liz Hicks Studios)
scissors
washi tape
bottled drink
hersheys kisses

To create these is super simple. I made the 2x2 cards by stamping the cardstock, adding some white washi tape and then writing on the card my sentiment "hugs and kisses". From here I tied the card around the neck of my soft drink and tied the string into a bow. I simply added the kisses with washi tape to add some chocolate to my gift because seriously... after 2 hours with (15) 8-9  year old girls... who wouldn't need a little chocolate?


Peanut Butter Blossom Cookies


Every year our neighborhood gals get together for a cookie exchange. It is by far my favorite time we get together because well, we eat... we chat and we all leave with a bunch of cookies... It's like an Oprah's favorite things moment for me :)

This year my neighbor made my kids favorites- Peanut Butter Blossom Cookies


If you really want to make something quick and easy... these are them. You can pick up the two ingredients (peanut butter cookie dough and hershey kisses) that you need at the store. If you have a little more time you could use this recipe here.


But seriously if you are in a pinch... all it takes is just these two ingredients to make these cookies happen. Super easy.


If you are interested in learning more about the Influenster program click here.

Hopefully this gives you some quick and easy ideas for some homemade treats.

Enjoy your weekend!

~Liz Hicks ♥


Tuesday, December 2, 2014

How to Make a Sweet Garland in just 3 Easy Steps

I am a HUGE fan of my projects serving a purpose in my home. I love when something I have creating can serve multiple purposes, it is kind of like multiple projects all wrapped into one! This tree garland is one of those projects... After the holidays this can easily be used in my daughters room decor all year long.


SUGAR PLUM TREE GARLAND


SUPPLIES:

Smoothfoam 1.5 inch balls
scraps of fabric in 1/8th to 1/4 INCH strips (these will be super thin)
glue gun for foam
scraps of lace, tulle and muslin for the spacers
optional: Clear thread

TIP: For this project, I used scraps of clearance fabric. This fabric was on clearance for $4 a yard at my local craft store, I maybe needed 1/8th of a yard so that puts each cut at about $0.50 each.

Step 1 Create Fabric Balls: (This is super duper easy...)
take your fabric and cut it into 1/8 to 1/4 strips. You can traditional cut with scissors or rip it for frayed edges. NOTE: try and keep your fabric strips thin as this will wrap easier.


Glue one end of your fabric to your foam ball. I used a foam hot glue gun to prevent melting. This works great to keep the fabric secured your your foam.


Wrap fabric around your foam ball until covered. You can cut and reposition your fabric and can glue down any rough edges as you go. This is why having thin pieces of fabric works best. the thicker the width, the more likely you are to get puckers of fabric you will have to glue down.

 Here is what the fabric looks like if it is too wide, I had to glue down the right side pucker.


Here is what it looks like when the fabric strips are thinner, creating a smoother application.


Step 2 Add filler fabric

For this I simple took 1x12 inch strips of white lace, muslin and sparkly glittered tulle and created "swags" in between each of the fabric covered balls.


TIP: Glue all three fabric edges together before attaching them to your balls.


You have two options on how to attach your fabric you your balls.

  1. You can sew them with a tapestry needle and transparent thread

  2. You can hot glue gun them together


Once you have one end of your fabric trio glued to your first ball, lightly braid or twist your fabric allowing all of the fabrics to show.

Continue this till you have one continuous strand of garland (make sure to add fabric to both ends anchoring your garland with fabric to hang if needed).

Step 3 EMBELLISH!

This is my favorite step! Add scraps of tulle, netting, sequin fabric or any colorful fun trim you can find. I used scraps that I have had in my stash for a while. The basic idea is that you want to add depth and texture to your garland through different types of fabric.


I LOVE the way this turned out and I extremely LOVE the fact that it can be used year round since I didn't use traditional holiday colors. The nice thing is that as you go to create your own garland you can add WHATEVER you want in WHATEVER color you want. This project is totally versatile and customizable to YOUR needs :)

The Smoothfoam balls I used were nice and light weight, didn't shed and kept their shape well during construction.

Thanks for stopping by!

~Liz Hicks ♥

Sunday, November 30, 2014

Shining a little JOY on recycled crafting

I kind of have a thing for turning trash into treasure. I guess it comes from my environmentalist mom but every time I look at a jar, a lid or even a plastic yogurt container I often think of things I can reuse them for around the house...give them a second life.

Of course these ambitious ideas never really seem to fit time wise into my life so through the year I tend to grow a collection of items... well today I am putting them to work!

JOY Luminaire Home Decor


Step 1- Frost the Glass
To begin these re-purposed luminaire, grab 3 spaghetti sauce jars clean and label free.


Using vinyl, cut out your designs. I used my ScanNCut and some of the built in snowflake and letter designs for this project. My machine settings were blade depth 2, preasure 2 and cut speed 1. Place the designs onto your clean glass surface. Contact paper offers the cleanest application.


Add a generous layer of etching cream to your glass and allow to process according to directions. I let it process for 15 minutes and used Etch-All etching creme.


Step 2: Colorize your jars

I use a turquoise permanent ink from Clearsnap to add some texture and color to the frosted glass. This helps to make the frosted glass pop with color and you can vary the saturation of the color just by adding more ink.


Step 3: Decorate and Display!


Add a little garland or tinsle to the top of your jars to cover up the lip of the jar and then display your jars with white tulle in them for day display.


Or instead of tulle, add some tealights for the dark to use these jars as luminaires.


These little recycled beauties are great night or day and can be created to be used all year around. These have a holiday twist but you can easily change the designs and make these work for any season. Its a great way to repurpose those jars and add a little style to your yard or home.

Thanks for stopping by today, I hope you will continue on the hop and use the link below to check out some more fun ideas to get creative during the holiday season.


Thanks again!

~ Liz Hicks ♥

Wednesday, November 26, 2014

How (and WHY) to make Truth Treats

If you are like me, chances are that after Halloween you are faced with a difficult decision.

What to do with all of the candy that your kids have collected.


This year our kids collectively collected 17 POUNDS of candy. That is a WHOLE lot of candy.

We are fortunate enough to live in a wonderful neighborhood where we know our neighbors well, our kids go to school with just about every child in the neighborhood and well... everyone knows everyone. In addition, it seams as if every house we went to we knew and well, they were very generous with the candy.

With this being said, after Halloween night, we sat as a family and had a little chat. There was NO way that our kids could use this much candy and well, we were not about to throw it away. We could donate it to a local organization or sell it back to a local dentist but what we really wanted was to put this candy into action and bless our community. Now our kids were not on board at first, I mean they really connected with the triumph of their loot... but we had to put it into reality for them. Either they find a way to use the candy in a positive way or next year we limit the houses they visit to just our street (which would have given them still more than enough candy). It clicked. If they were going to be blessed by our neighbors and enjoy themselves each Halloween... then the blessing would need to be passed on.

And THAT was what birthed the idea of Truth Treats.


I reached out to my friend Melody Ross of Brave Girls Club and asked if we could use their truths to add a little encouragement to each treat we shared... She graciously said yes.


Melody has in the past done a very similar project on Black Friday, which is what made me think of her when we were trying to come up with an idea for this candy. If you have a chance... definitely check out their site... it will surely inspire some great ideas for the holidays as well as for your heart.

We created these truth treats to pass out to shoppers during Black Friday. This is a great time to catch people when they may need it most. As a family we have shared these truths during the holidays and you would be amazed at how easy it is to touch someone when they need it most. Although the holidays are usually surrounded by loved ones and togetherness... you'd be surprised as to how alone and discouraged the holidays can make people feel. One of the ladies we gave one of these random truths to (at an airport) actually cried when my daughter handed her a truth and gave my daughter a big hug. She told us that this was exactly what she needed to hear as she was going through something very difficult in her life. Kindness matters... and it matters the most when you let your heart lead you... and pave the way for good to happen.


If you would like to see more about "truths" as well as the BGC Truth Cards... Click Here.


TRUTH TREATS


Supplies:

  • Treat bags (We got ours at our local hobby store 50 for $2.99)
  • twine/ribbon/string - To tie the bags
  • Candy- This can be left over candy OR you can purchase bags of candy just for this occasion
  • Truths- You can print the Brave Girl Truths HERE  (Pages 6-9 are perfect for this)
  • Ready and willing kids to volunteer (We invited our daughters girl scout troop as well as our neighbors)

Contents of each bag- 6 pieces of candy, a truth and a whole lot of LOVE (tied with a sweet bow)


I really hope you will join us on this journey and come up with a way to share TRUTH, COMPASSION and CHARITY this holiday season. We would LOVE to see what you come up with. Use the hashtag #truthtreats to share your truth project with the world!

Much love to you this season,

~Liz (and family) ♥

Thursday, November 20, 2014

Easy DIY Teen Cell Phone Case

As promised here is the doodled Dollar Store phone case video tutorial featuring Sakura Glaze Pens.
Its a super easy idea that uses a simple dollar store phone case. What a great way to add a little fun to something so inexpensive. Its the perfect way to add a little hand made to your holiday this year.


I am finishing up some of the other videos I worked on for the Handmade Holidays Blog Hop, so stay tuned for more inexpensive and easy hand made fun.

If you are looking for more inspiration, make sure to look at my original post for all of the blog hoppers and their ideas for handmade gifts. There were over 100 project ideas in total with this blog hop so you are sure to find some great inspiration.

Thanks for watching!

~Liz Hicks

Saturday, November 8, 2014

Easy DIY Girls-Teens Gift Set

Handmade Holidays 2014 Hop Logo
Welcome to day 2 of the 4th Annual Handmade Holidays Blog Hop! A few years ago we were looking online for handmade gift ideas and thought it would be great if there was a resource dedicated JUST to handmade gift ideas. Enter the Handmade Holidays hop! We've gathered over 100 of our creative blogger friends in the craft industry as well as some of our fellow product manufacturers to bring you a plethora of inspiring gift ideas you can make now to give to your friends, family, and colleagues. Pin and bookmark these ideas for this holiday season and to use throughout the year! Each day of the hop features approximately 30 gift projects and you can "hop" from one blog to another to check them all out.

I don't know  about you but shopping for tween girls is tough. You can't buy them princess girly stuff, but (as much as they would disagree) you also can't just buy them stuff they are just not ready for yet. To add to this, you have to be very specific about colors, designs... no princess, well maybe just one but if its the wrong one, well then... it could really mean ANYTHING.

I am going through this 8-12 age range with my daughter. I have really enjoyed it but am still baffled as to what style she enjoys (especially since it changes... ALL THE TIME).

SO with this in mind, I thought it might be fun to share some fun, EASY DIY gift items that will still be age appropriate yet make this age range of developing girls feel special, appreciated and acknowledges for the age and "maturity" that they are.

Here are a few of the ideas I came up with. Make sure to check back in the next few weeks for some more simple DIY gifts.

Tinted Vintage Vanity Tray- using Clearsnap Surfacez Solvent permanent Inks


This old brass vanity tray got an updated and chic make over with the help of Surfacez Ink by Clearsnap.


 Available here:Surfacez Ink Pads and Refills


Doodle Iphone Case using Sakura Glaze Pens

Here is a beautiful custom $1 store cell phone case using Sakura of America's Glaze Pens. The pens are great for doodling on non porous surfaces.


This tutorial will be one of the videos I will be sharing within the next few weeks :)

Available here: Sakura Glaze Pens


Floral Travel Bag using Oly-Fun fabric


Available here: Oly Fun

Like I said, I will be posting more videos and quick tutorials featuring these or other projects within the next few weeks... I just didn't have enough time to feature all of my projects in this one post :)

Are you ready for lots more creative handmade gift ideas and projects?? Follow along on our blog hop! Simply click on each of the links below to be taken to that post with additional information and photos on how to create a handmade gift project. Have fun and pin away!

 Clearsnap  Ellison Educational Equipment  Walnut Hollow  Graphic 45 Hydrangea Hippo Westcott Scrapbook Adhesives by 3L Rowland Technologies Neat and Tangled ICE Resin Therm O Web Elizabeth Craft Designs Pink and Main The Buckle Boutique Clearsnap - Vivian Keh Ashley Rader - Giddy Upcycled ICE Resin - Jen Cushman Candy Spiegel- Candy Scraps Graphic 45 - Andrew Roberts Rina Gonzales - Mothership Scrapbook Gal Therm O Web - Amanda Niederhauser Cori Warner - The Flying C Yana Smakula - My Cardmaking & Scrapbooking The Buckle Boutique - Shawn Mosch Eileen Hull Designs - Eileen Hull Angela Muir - Handmade in the Heartland Krista Winters - eat, knit & d.i.y. Scrapbook Adhesives by 3L - Erica Houghton Katie Smith - Punk Projects Elizabeth Craft Designs - Karen Aicken Jeanie Hevener - Create & Babble Ellison Educational Equipment - Hilary Kanwischer Fancy Shanty - Stacy Molter Liz Hicks - Blogerisms 

 a Rafflecopter giveaway

Follow our Handmade Holidays Gift Ideas Pinterest board for even more inspiration!

Follow Jennifer Priest of RainMaker Media Works + Hydrangea Hippo's board Handmade Holidays on Pinterest.

A huge thank you to our sponsors for this hop - please visit their blogs below and follow them. And be sure to come back tomorrow for another 30+ amazing Handmade Gift Ideas!

Handmade Holidays 2014 Hop Logo SPONSORS 300dpi


Clearsnap || Ellison Educational Equipment || Walnut Hollow || Graphic45 || Westcott || ICE Resin || Therm O Web || Rowland Industries || Scrapbook Adhesives by 3L || Pink and Main || Elizabeth Craft Designs || The Buckle Boutique || Neat and Tangled

Additional Sponsorship provided to bloggers by:

Sakura || Fairfield Processing

Product has been provided by sponsors for this blog post although opinions are entirely that of Liz Hicks Studios. No monetary compensation was collected for this blog post nor for links. Links provided are for educational purposes. This blog does not receive compensation for purchases made from these links.

Thanks so much for check out our blog hop today :)

~Liz Hicks

Monday, December 3, 2012

Dark Chocolate Ganache Truffles Recipe

Within my down time, I have had some fun experimenting with some recipes. Tonight we have a Cookie Exchange in our neighborhood and although it is cookies that are exchanged... I have yet to make a cookie. Last year I made these Oreo Mint Truffle Cake Pops and the year before it was my Peppermint Cookie Crunch Bark. I guess I am just a rebel like that. This year I decided to create this recipe for Chocolate Truffles by Food Networks Ina Garten. Although that was the plan... I ended up changing things up a bit and adding my own twist.

Dark Chocolate (Chili) Ganache Truffles
yields about 4 dozen


Let me start off by prefacing this recipe as the combination of a few different obsessions that I have found myself guilty of.

  1. I love chocolate. Period.
  2. I watched Chocolat once about 10 years ago and became OBSESSED with the idea of chili chocolate... So much that when I was pregnant with our second son I craved it and unfortunately it was not popular then and I couldn't find it anywhere (this was in my pre-make-it-myself days).
  3. Ganache. I finally learned what this creamy goodness was called a few years ago (after eating a box of truffles one Christmas with my Mother in Law, pretty sure I ate more than her, lol). 
So with these few details swirling in my head it was just a matter of time that they all surfaced at once in the form of a new obsession... to create a truffle that was sweet with a mild spicy kick.

Ingredients


Instructions

Chop Chocolate bars and Chocolate chips so that it can easily melt. I recommend using a food processor if possible, if not pieces like the size shown below are easy to cut with a knife. Place all chocolate in a heat proof bowl.


Heat the cream in saucepan just until it boils. Turn off the heat and allow the cream to sit for 20 seconds. Pour the cream through a fine-meshed sieve into the bowl with chocolate. With a wire whisk, slowly stir the cream and chocolates together until the chocolate is completely melted. Mix in vanilla. Set aside at room temperature for 1 hour.


This is where I had a little trouble, and well I think it had something to do with the fact that I was creating a double batch of the original recipe, so I gauged my wait time until my ganache had settled up a bit. By this I mean that it had been allowed to solidify a bit and become maliable with your hands to shape. I recommend starting by allowing your chocolate to sit at room temperature until you can scoop your ganache and not have the remaining ganache fall within where you scooped (so it is just a little solid). Take a regular table spoon and scoop out enough ganache to form your truffle, about enough to make a truffle about the size of a grape. Place spoon fulls on to a cookie sheet covered in parchment paper. Allow to harden in the fridge for about 30 minutes.


From here take the 1/2 cup of cocoa and powdered sugar and mix thoroughly together in a bowl. Take each spoon full of ganache and place it in the powdered mixture one at a time, first coating them pressing ganache into a circle. Once formed, coat again with powdered mixture. Place on a new piece of parchment paper on your cookie sheet. Once all truffles are rolled. Place your treats into your refrigerator and allow them to harden. I recommend allowing the truffles to set overnight or at least until they are firm. The original recipe states to serve at room temperature, but I would serve them fresh out of the refrigerator. I kind of like them a little more firm.


I hope that this recipe finds you well and hungry... Let me know if you try it out, it is messy, tempting and addictive... but a worth while recipe to spend some time and have fun with. I am using this as my gift giving recipe for the year. I think that these will bring a lot of smiles this Christmas :) If you have ANY questions... feel free to email me and I would be happy to help :)

Thanks for stopping by,

~Liz Hicks ♥
Tuesday, October 9, 2012

Getting funky with Crafty Chica Products- Part 1

A few weeks ago I was given a wonderful opportunity to play around with some Kathy Cano-Murillo A.K.A Crafty Chica products that are hitting select Michaels Stores. I have said this before and I will say it again... I adore Crafty Chica :)

I met Kathy a few years ago at CHA while I was working for Tattered Angels. I knew of her passion for crafting and her heritage, but what I found in Kathy as I got to know her, was a passion for people and helping others reach their goals and dreams... I love this.

After receiving a set of iron on transfers and one of her new Market Totes, I set out to create three separate projects that could reflect the fun and freedom that these designs exhibit. Today, I am sharing a mixed media canvas featuring one of the iron on transfers.

Love of My Life 

14x14 Mixed Media Canvas

Supplies:Iron on: Crafty Chica for I Love to Create, Ink: Tsukineko, Pens: Sakura of America, Paint: Plaid Enterprise, Spray inks: Clearsnap, letters: Prima Marketing Inc, Spray Paint: Krylon, Stencil: (handmade by me) Unknown: Canvas, vintage paper, thread

This canvas is dear to my heart. When I saw the heart on fire iron on, I knew I wanted to create a canvas with it for sure. There is a song that is on Santana's Supernatural CD that is sung with Rob Thomas from Match Box 20. This is the song that my husband use to sing to me when we were dating. The words are beautiful and well, I thought this heart matched the words to that song so well... So as a birthday gift for my husband, I planned to create this canvas for his office. I wanted to add a few more of the hand drawn flowers, but my husband caught wind of the project and had me stop right here... he liked it just the way it was. Who am I to argue with him?


Here is a close up of the side. It is raw, yet for some reason my husband likes it that way... I do too :)


Here is a close up of the words, this is part of the chorus of the song. My favorite part of the song :)


Here is a close up of the brick stenciling that I created with a homemade stencil and modeling paste. I then painted the brick silver with spray paint and accented it with Staz-On ink.


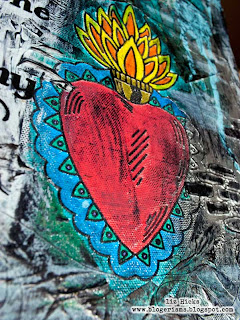
 And of course, here is the iron on heart that inspired this canvas.


*I received this complimentary product(s) from CraftyChica.com as part of the Crafty Chica Design Team and was asked to share an original DIY project.*


I had a lot of fun creating this canvas especially since I can see how much my husband loves it. It is a wonderful delight when you can see someone appreciate your creation. Makes it all worth it :)

Thanks for hanging out with me today :)

~Liz Hicks ♥

Wednesday, August 22, 2012

Back to School Teachers Gift- easy and fun PLUS Bo Bunny Giveaway

 I have a report up on The Scrap Review today! I was fortunate enough to be able to review BoBunny's new Detour Collection.


Now technically, I am a scrapbooker... but my inky painty side always kicks in, so here are a few peeks of some of my projects from my review. To see the rest of the projects, my full review AND a GREAT GIVEAWAY... make sure to check it out here on The Scrap Review blog.


I had some product left over so after I finished my projects for the review... I made these little cuties for the kids to give to their teachers yesterday since it was their first day of school. I had to work quick, but I think these came out pretty cute considering the time I had left before picking the kids up from school. (On a side note... making sure that your cookies have time to cool after baking is highly suggested, I learned the hard way)


If you are looking for a fun idea for a back to school teachers gift... this is a fairly easy one and was a huge hit!. Even the kids loved it.

Instructions:
  • Make yummy cookies :)
  • take a regular size sandwich bag
  • Use a 6x6 piece of patterned paper... I used the Bo Bunny Collection for this one, fold in half
  • Seal sandwich bag and place the folded crease on top overlapping the bag
  • Next staple starting with one side, folding in excess bag as needed, staple other side to completely seal
  • Decorate your topper as desired!
This is a really easy homemade teachers gift yet fun too! The teachers LOVED them and the kids thought it was funny that the teachers would have an emergency that required cookies!